Great Design is Not Out of Reach

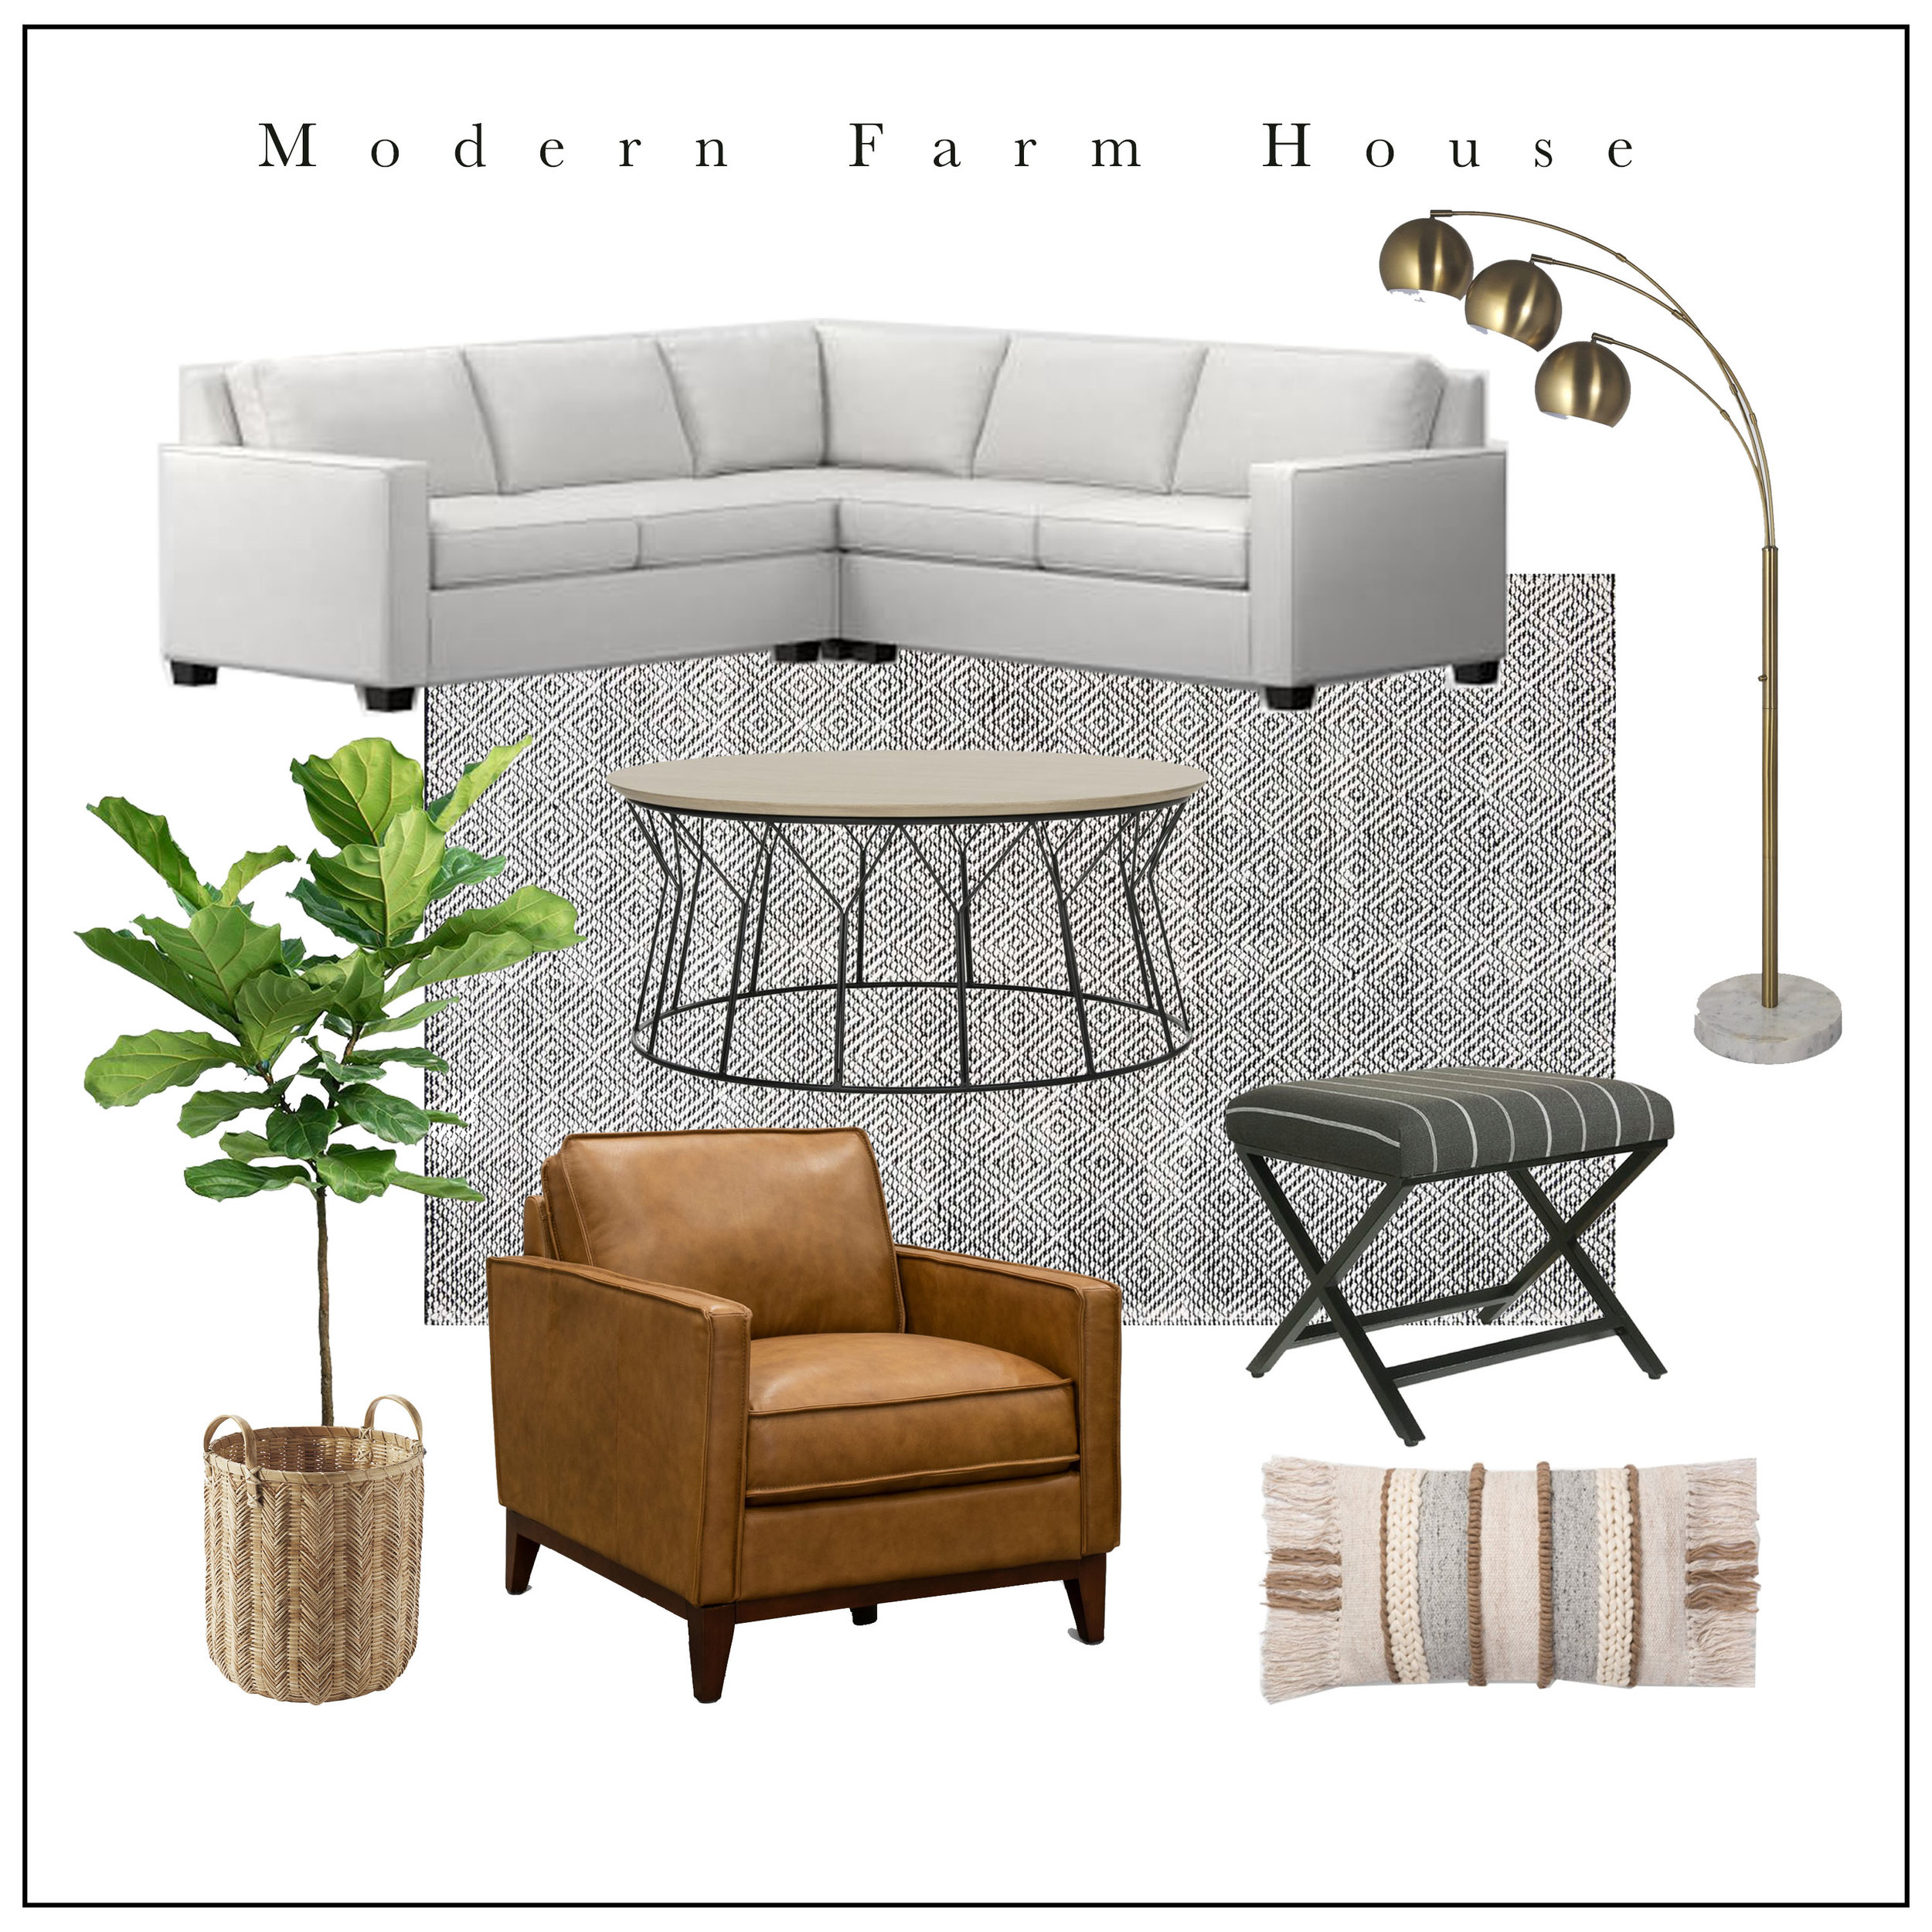
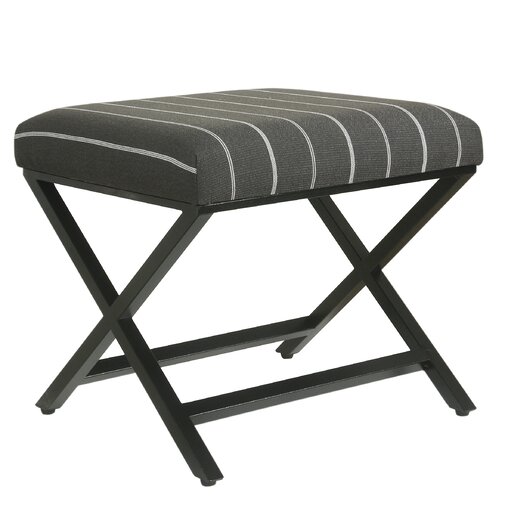
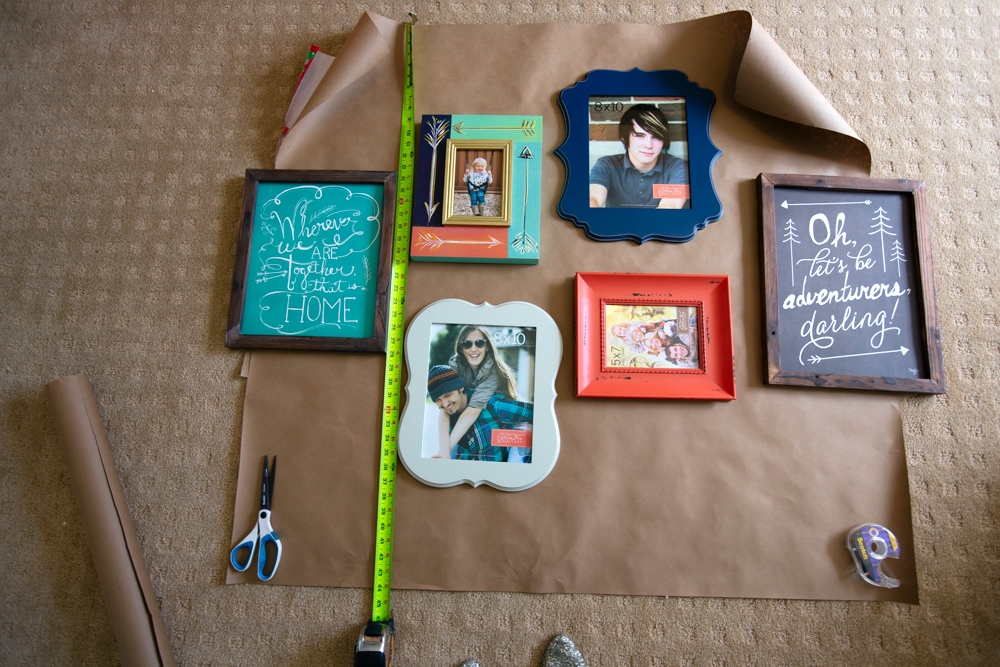
Buying individual items before making sure that they fit together is a mistake that many make. Creating a design board and being sure to lay all the items that you have your eye on out together ensures that they really fulfill the vision that you have for your room.

Don’t worry if you don’t love using photoshop or don’t have time to throw a design board together! You can arrange all your saved pictures of items you love on your desktop so you can see them all together. This will help you envision with that room will look like.

Screen Shot 2019-03-28 at 10.23.14 PM.png

To do this: Right click on the product you are thinking about adding to your design. Save the image to your desk top. Once all of the products are saved on your desk top open the items and arrange so you can see them all together. Once in a while a image can’t be saved, not to worry, you can screen shot the item. On a Mac you press the following buttons at the same time: command + shift + 4. If you are on a PC you can press: Crtl + Print Scrn. Or if you have a program like photoshop, it’s very easy to create a simple design board. Believe me, if I can do it, you can too.

Lincoln's.jpg


Design Goal: Simplicity

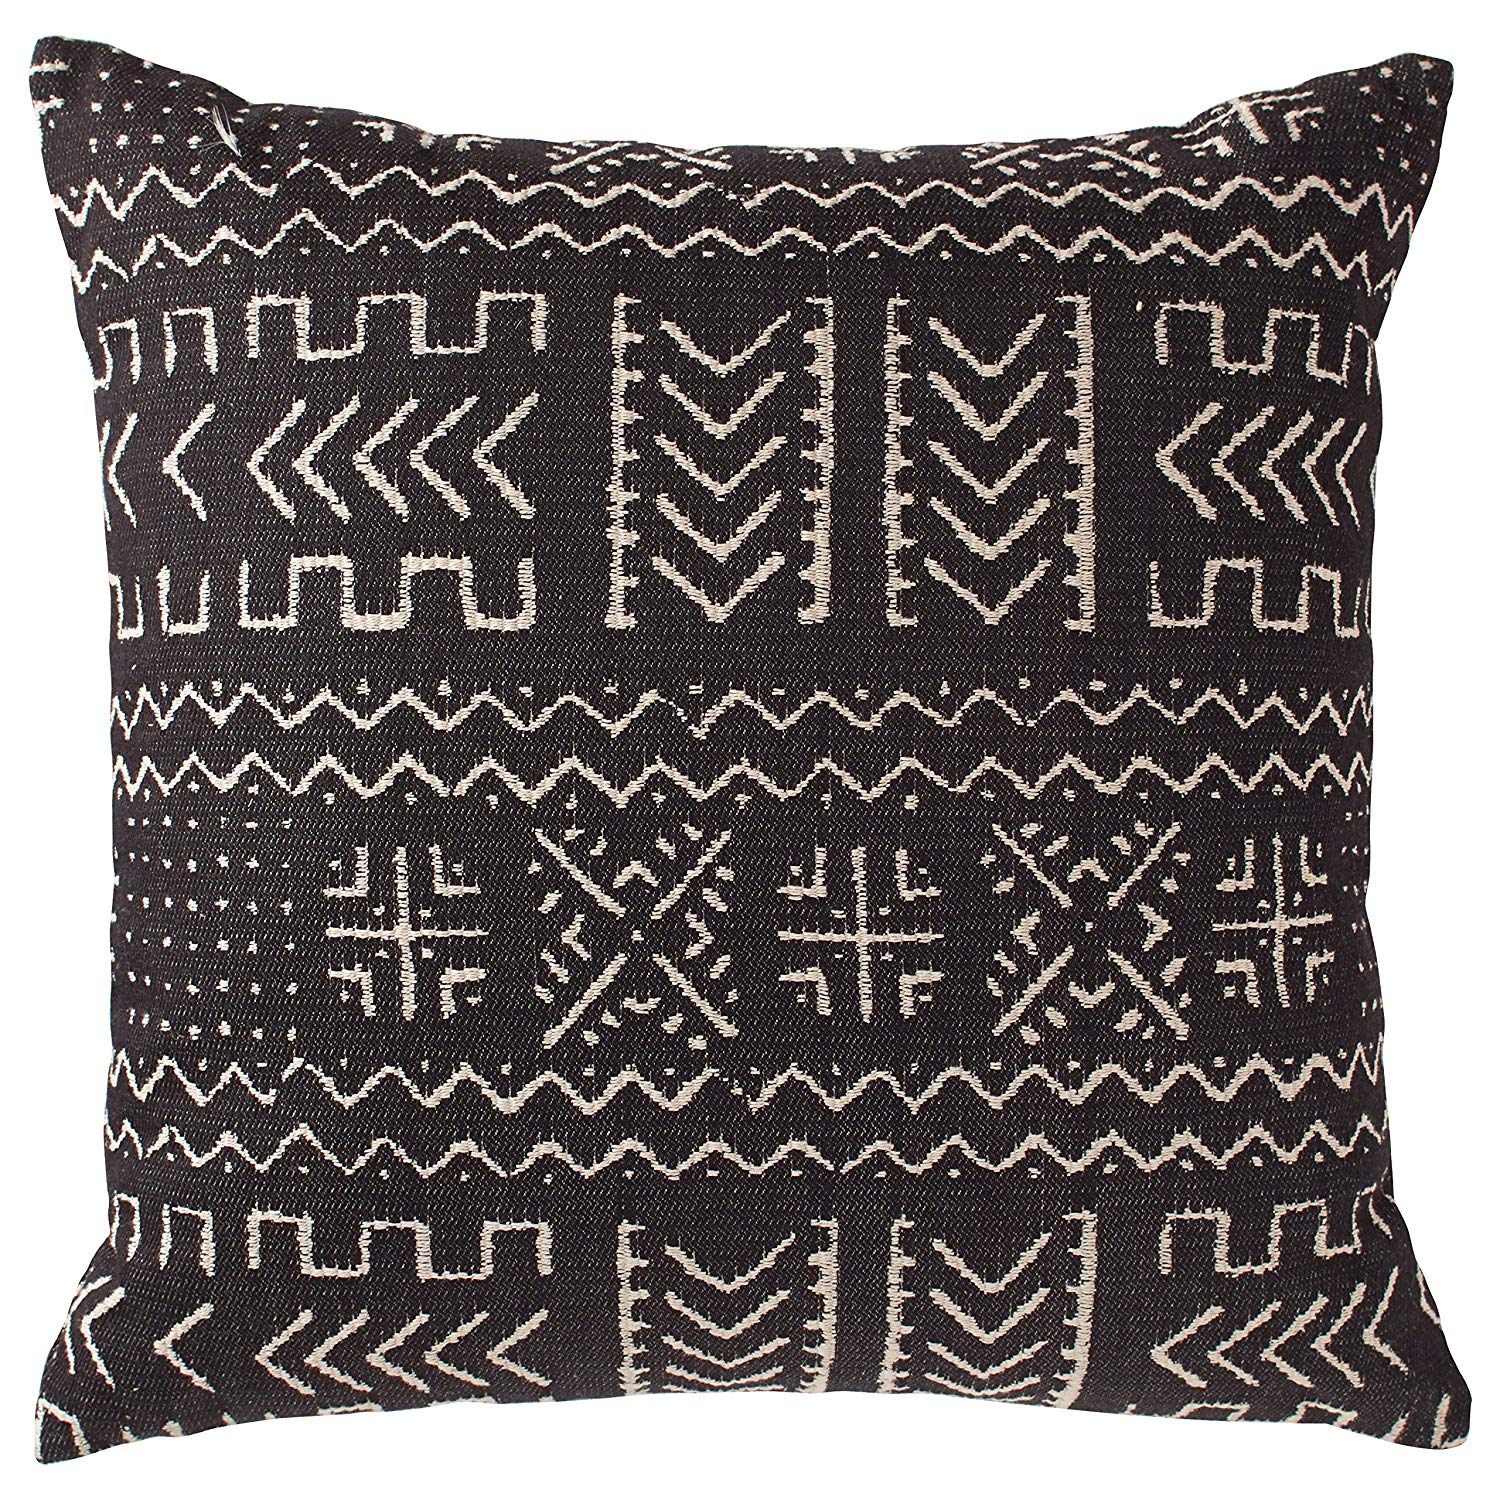
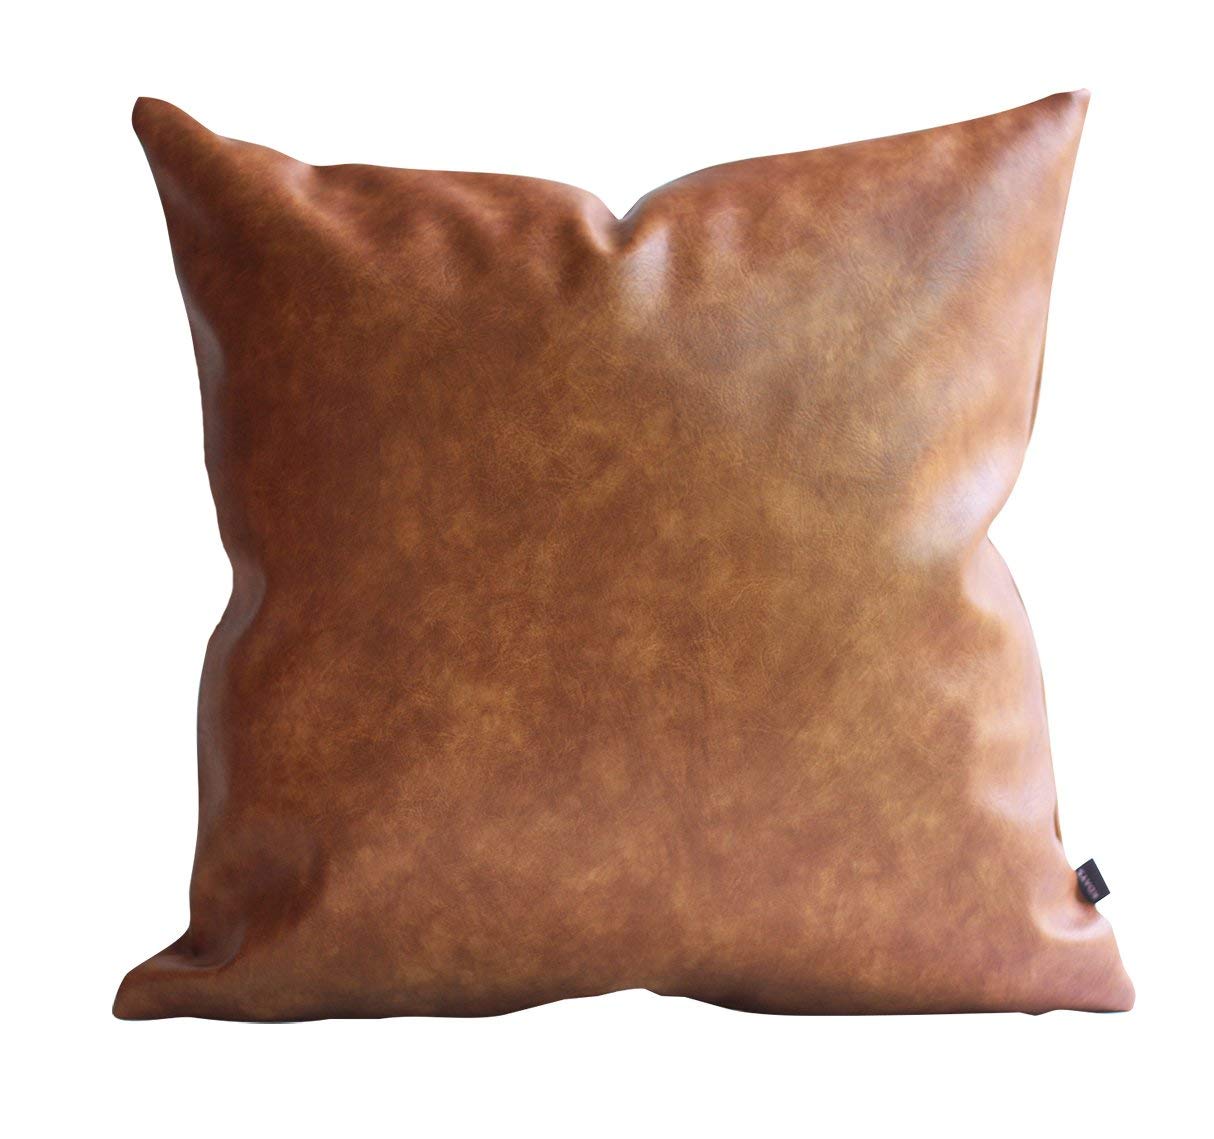
For this space, my goal was to keep the design simple without it looking too boring.  I used snowball white by Sherwin William on the walls for a clean, bright canvas. From here, I was able to add any color to add a pop.  By adding a black iron bed and built-in, the bold lines were emphasized and created a nice contract. Staying true to the theme of the room, I chose simple black and white bedding, but warmed it up with a couple pillows. The faux leather pillow gave the room some warmth, while the black printed pillow added some motion with a pattern.To top it all off, I used a cream pillow to add some texture.
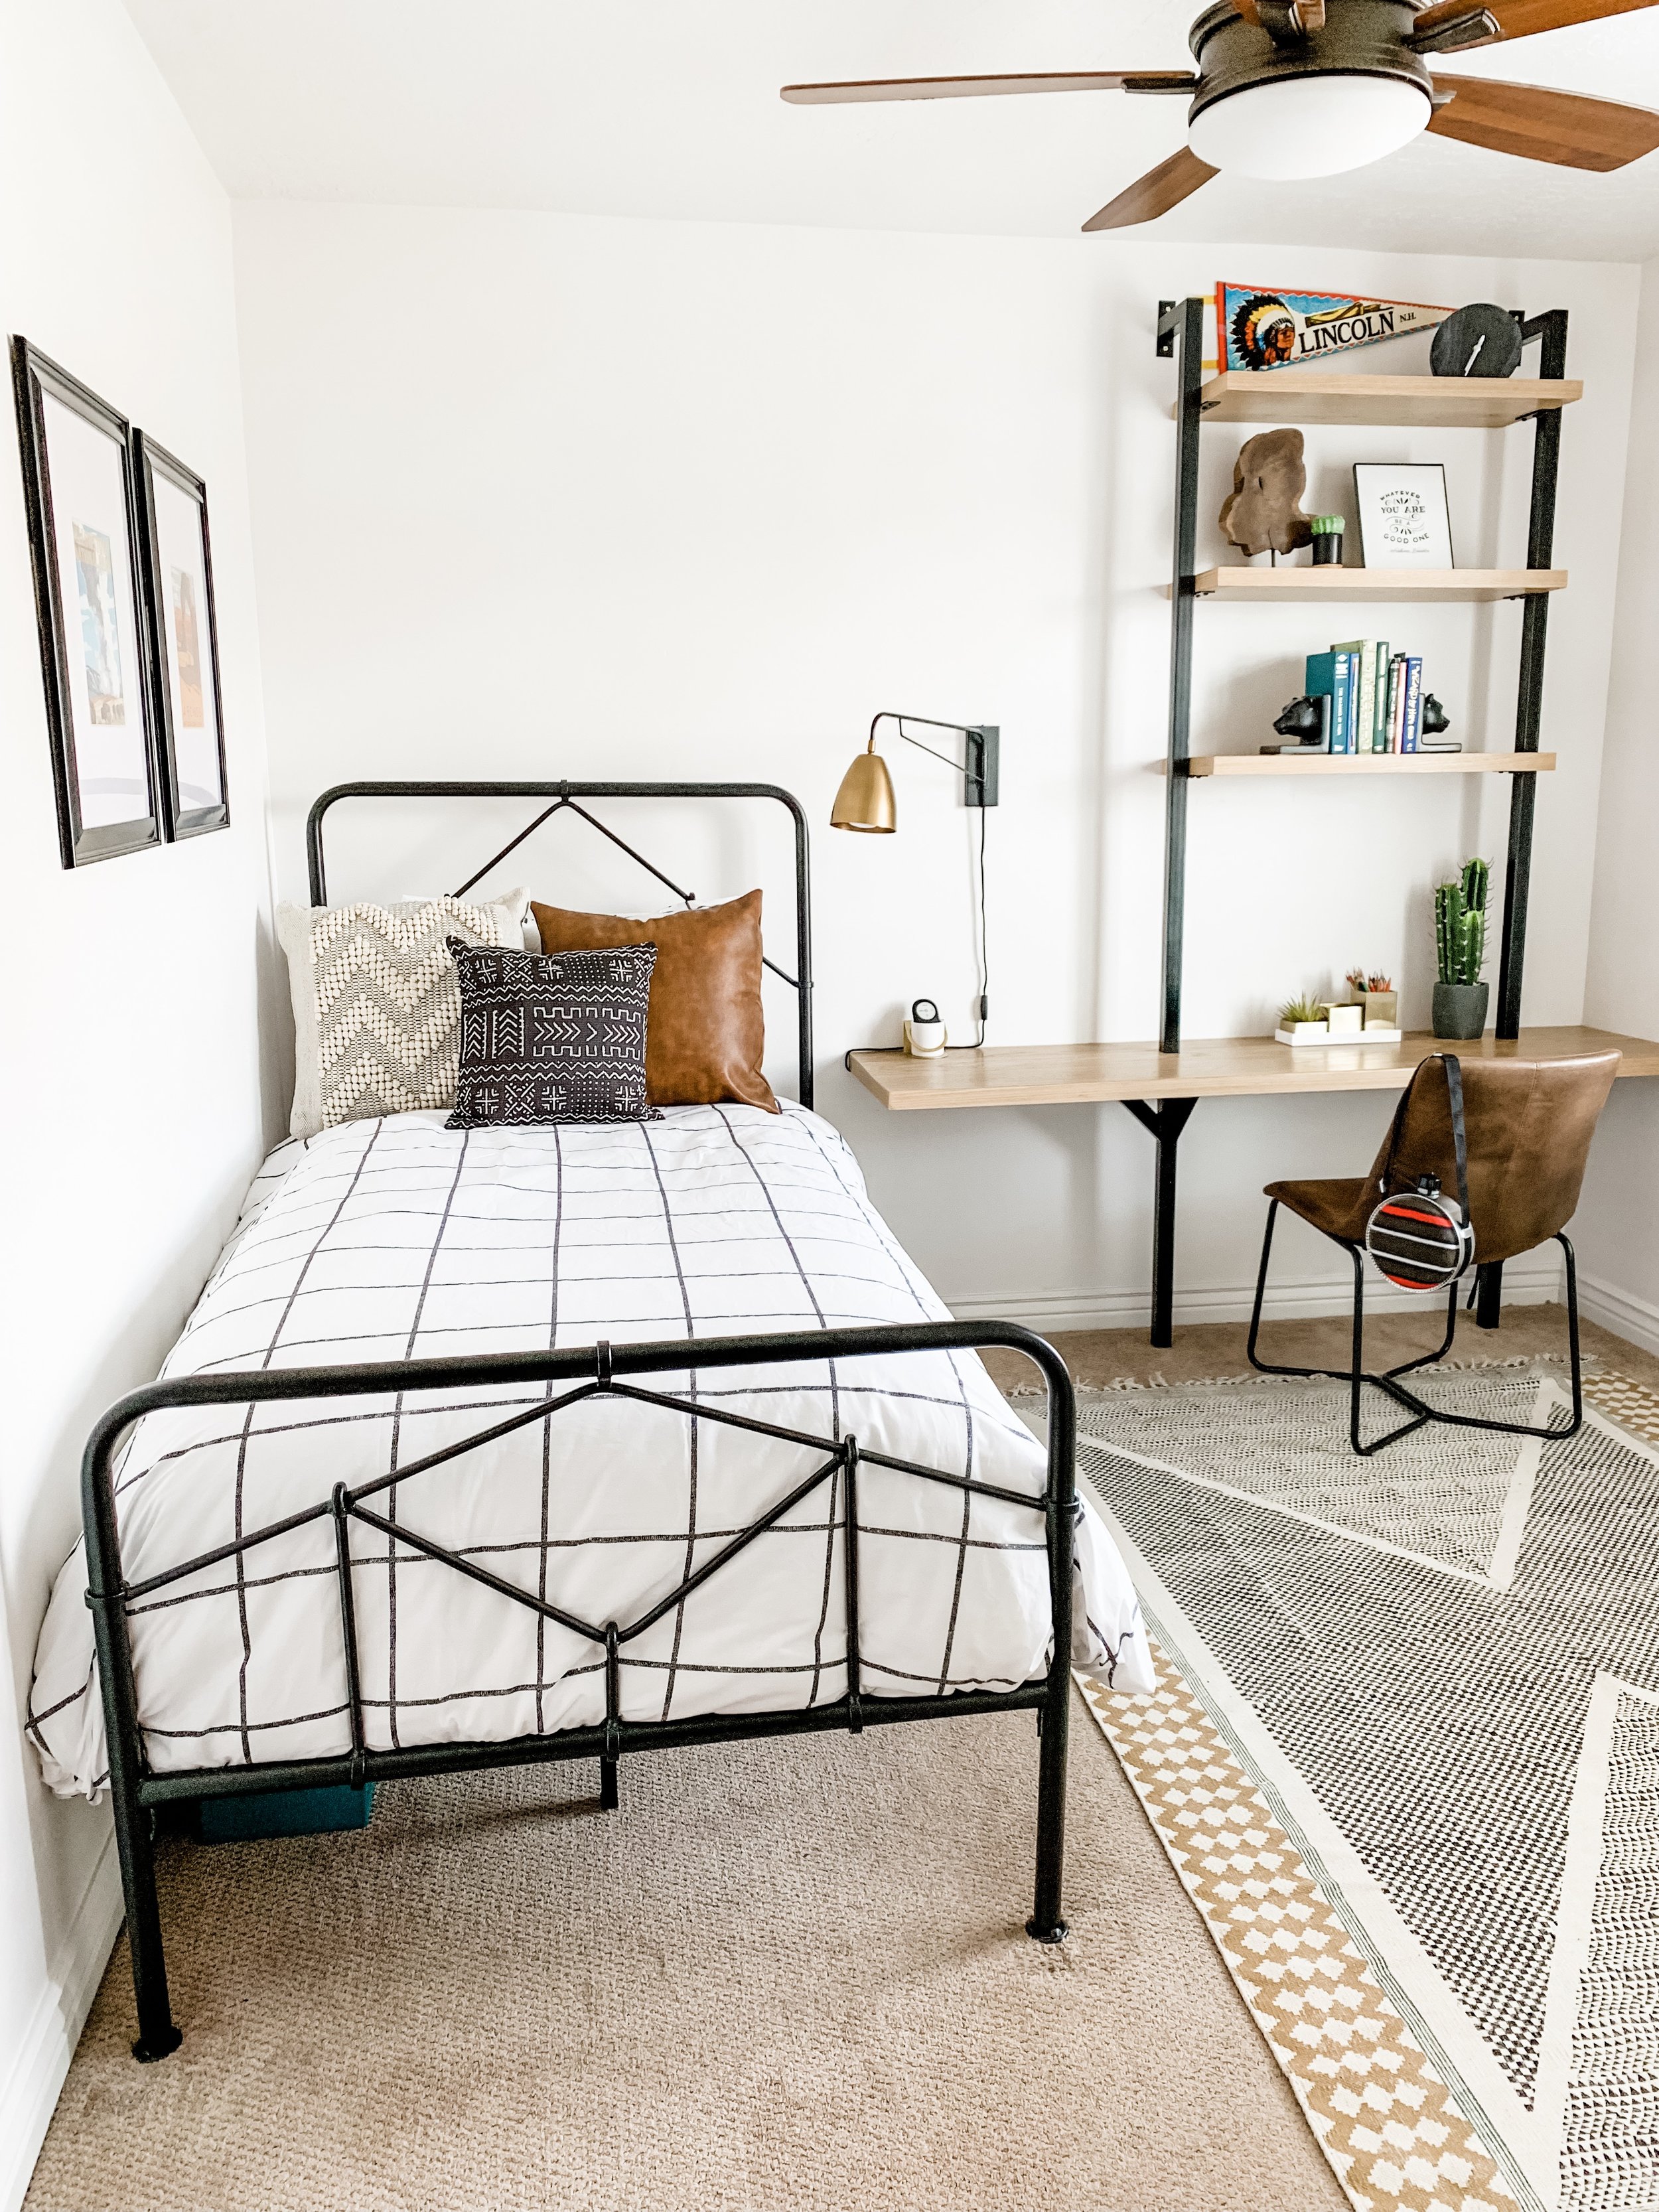
IMG_0819.JPG


Built-ins:

The custom built in shelves/desk/night stand is really the star of the show. It’s built out of plywood with a white oak veneer and steel that was spray painted black. If a custom-made piece it out of reach, here are some other options that give the same effect:


https://www.westelm.com/products/mid-century-wall-desk-h1693/?pkey=coffice-desks&isx=0.0.7122

https://www.westelm.com/products/foundry-desk-dark-walnut-h4327/?pkey=coffice-desks&isx=0.0.7122

https://www.westelm.com/products/rustic-modular-48-desk-h967/?pkey=coffice-desks&isx=0.0.7724

https://www.cb2.com/helix-96-acacia-desk/s660211

https://www.cb2.com/helix-acacia-desk/s33438
https://www.cb2.com/helix-70-acacia-bookcase/s328328


Accessories:

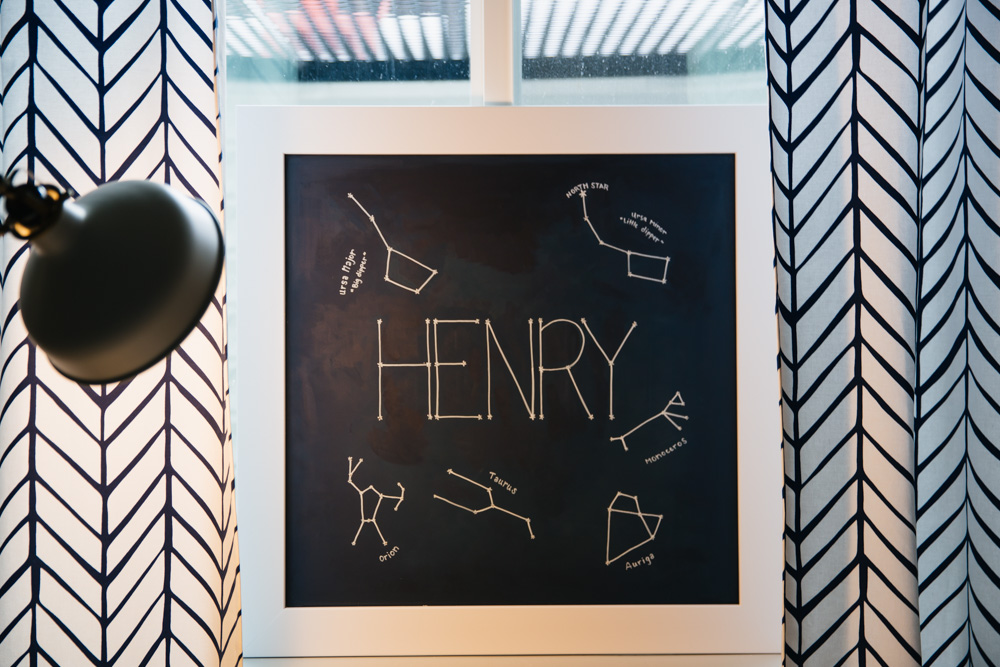
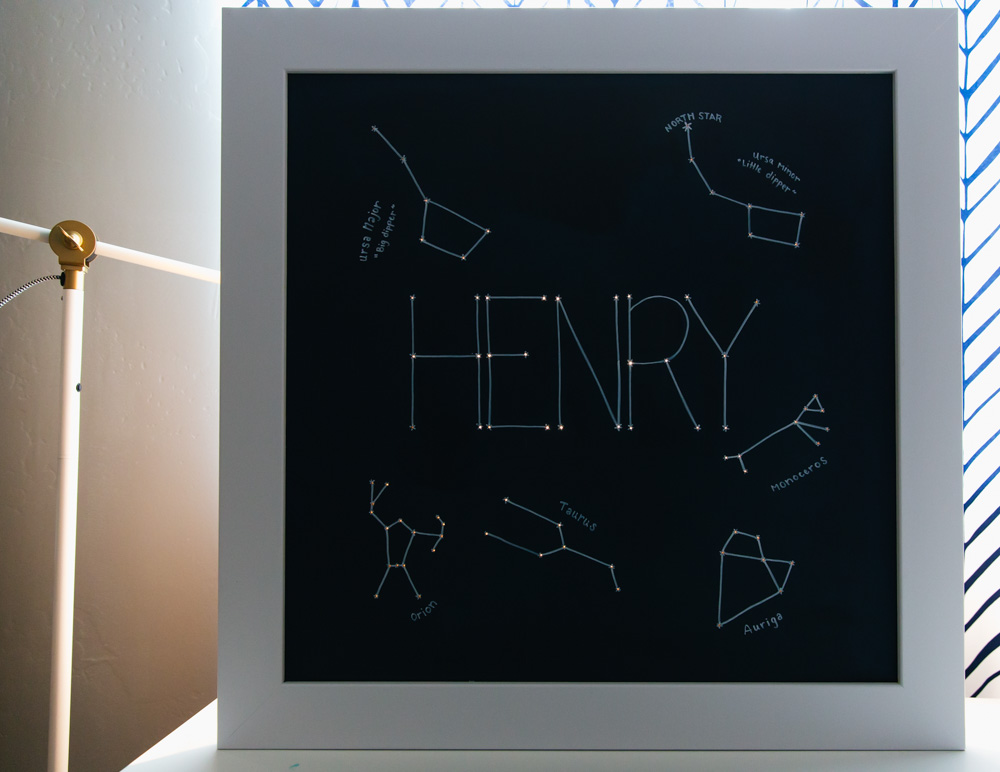
I chose the artwork based on the interests of my son. That boy loves a good outdoor adventure! I found the mats and frames for a really good price from Walmart from Walmart. The prints were only 8x10, which was smaller than I wanted.  For a bigger impact on the wall, I added a large white mat and a very simple black 16x20 frame. The black and white keep it clean, simple and bold, but adds color and a personal touch.

IMG_0839.JPG


Staying true to the goal of the room, I kept the accessories were simple to keep things from getting too cluttered.  All of my son's nicknacks are stored carefully on a shelf in his closet or under his bed - still with easy access but not for all to see! Because he’s a 12-year-old boy, he doesn't feel the need to have all of his trophies and painted ceramics on display.  That being said, I wanted to keep things person. His name is Lincoln, so bought a vintage pendant banner from Lincoln, Nebraska. I also had a local artist hand-draw a quote by Abraham Lincoln. Some of Lincoln’s favorite books on display and are paired with black bookend from Target.

IMG_0846.JPG


The secret is to keep things simple! I topped off the look with a pencil holder and a black stone clock. While minimalistic, this kept the design function yet beautiful.


If you are interested in a design board made by me, don’t hesitate to reach out! Send me an email with your design dilemma, measurements of the room you want to transform, and a few pictures for inspiration to get started.  We can chat about the style you’re going for, what purpose you want to use the room for, and a budget. I’ll find the items need for your space and send you links for approval and purchase. If you are local, I would be more than happy to come and set the room up with the items you picked. If not, I’m available to help on the design layout over email and FaceTime.  Great design isn't out of reach.

IMG_0822.JPG


What to do with an awkward window

My darling sister called me a few weeks before her baby was due with a design dilemma. 

In her condo she has a small square window that is just floating awkwardly on a wall of her soon to be nursery.  She wonder what she should do.  Do you put blinds in it?  Do you hang curtains and if so are the long or short?  None of these ideas were very appealing or attractive.  So after a little brainstorming, I came up with a brilliant idea, if I do say so myself.

I paint a sheet of masonite a few shades of navy blue, carefully painted a few simple constellation and her son's name Henry.

Once it was dry I drilled small pin size wholes through each star.  That way when the sun is shining bright (which is does a lot in Las Vegas) tiny rays of sunshine peep through the holes, making the stars shine.

She didn't need the natural light from this small window, because she has a normal sized window on the other wall.  So this custom art piece does double duty, it helps control light for nap times and covers up a silly little window.  

You don't have to make your own art, to cover up a window, you can use a canvas, or a framed picture.  It does get a bit tricky to hang because there is nothing in the middle to hammer a nail into.  If what your hanging is light enough you can use command strips on the edges.  If there is something awkward in your space feel free to email me and I will try to help you come up with a creative and stylish way to solve it.

Garrett's Bedroom

How do you decorate a teenage boys room?

- Use their interests as inspiration.  Garrett loves the ocean, mountaineering, playing his guitars and photography.

-Keep it simple.  When his mom and Garrett decided on a beach theme, keeping it simple was key.  It is hard to pass up the clearance section, but put the giant sand dollar back on the shelf and walk away.  I wanted this room to feel relaxing and not like a themed room, a model home, or like grandma's Florida beach condo.  

-Make it functional.  We created a place to play guitars and hang out with friends.  We created a photo wall that is easy to change out the pictures to keep it fresh.  Most of the furniture was already in the room so we completely change this room without spending a ton.


GarrettRoom2.jpg

Crepe Paper Flowers

Making these beautiful flowers is both fun and easy.  There are so many possibilities, colors and sizes.  I made one to decorate a gift but I am planning on making several more, stinging them together to use to decorate a tween's bedroom that I'm working on right now.

IMG_2077.JPG
I bought rolls of crepe paper at www.papermart.com . The selection was great and the price even better.  I've purchased crepe paper before and paid a lot more then I did here.

I bought rolls of crepe paper at www.papermart.com . The selection was great and the price even better.  I've purchased crepe paper before and paid a lot more then I did here.

Cut out circles.  These don't have to be perfect!  Fold your paper a few times.  You should be able to cut 6-8 circles out at a time.  And again, these DON'T have to be PERFECT!

Cut out circles.  These don't have to be perfect!  Fold your paper a few times.  You should be able to cut 6-8 circles out at a time.  And again, these DON'T have to be PERFECT!

I cut the yellow center circles a bit smaller.  And leaves out of the green.  

I cut the yellow center circles a bit smaller.  And leaves out of the green.  

Pinch it in the center.

Pinch it in the center.

I secured it with a simple needle and thread.  The first time I pulled the thread and the knot on the end clear through.  So when trying again, I stopped before the end, and tied a loop knot around the flower.  (Just like when you tie…

I secured it with a simple needle and thread.  The first time I pulled the thread and the knot on the end clear through.  So when trying again, I stopped before the end, and tied a loop knot around the flower.  (Just like when you tie your shoes in a double knot)

I sewed three peach circles,  then three yellow circles and finished with two peach circles.  

I sewed three peach circles,  then three yellow circles and finished with two peach circles.  

When your finished pull the string tight, making the circles move together closely.  And tie a knot around the last flower, just like you did with the first.

When your finished pull the string tight, making the circles move together closely.  And tie a knot around the last flower, just like you did with the first.

On the same color circle, squeeze a large amount of hot glue on the circle.

On the same color circle, squeeze a large amount of hot glue on the circle.

Quickly press the gathered circle onto the hot glue, and hold it in place for a few seconds.

Quickly press the gathered circle onto the hot glue, and hold it in place for a few seconds.

Apply more hot glue if needed to secure the flower.

Apply more hot glue if needed to secure the flower.

Add the leaves, two or three.  If there seems to be a gap, just gather up and another circle and add some glue and place it in the gap.

Add the leaves, two or three.  If there seems to be a gap, just gather up and another circle and add some glue and place it in the gap.

Tara's Master Bedroom Makeover

I have a good friend named Tara, she is EXCELS at everything she does.  But when it comes to making decisions she has a hard time.  She is always second guessing herself.  She asked me for some help making over her master bedroom.  She had a small budget only $200.  But the results were impressive.  Luckily she already had a great color on the walls, so no painting was necessary today.  The two hundred dollars couldn't buy her a head board or new bedding (I'm a decorator, not a miracle worker!) But it did buy her a inexpensive bookcase from Target and great accessories from Hobby Lobby.  

Before

5D3_5694.jpg

After

5D3_5706.jpg
This simple and inexpensive bookcase from target filled the empty space, and provided great storage for beautiful decorations.  Some like the picture frame, geometric terrarium, and gold orb came from Hobby Lobby.  And the rest includ…

This simple and inexpensive bookcase from target filled the empty space, and provided great storage for beautiful decorations.  Some like the picture frame, geometric terrarium, and gold orb came from Hobby Lobby.  And the rest including the plants, books, watering can, coral and carved jewelry box came from Tara's own home.  It's amazing what you can find when you go on a treasure hunt in your own home.


Before

5D3_5695.jpg
5D3_5696.jpg

After

The main focus for this side of the room was to declutter.  We removed the piles of books, the old bakers rack and replaced it will the matching night stand.  We kept the lamp bases, but just replaced the shades.  

The main focus for this side of the room was to declutter.  We removed the piles of books, the old bakers rack and replaced it will the matching night stand.  We kept the lamp bases, but just replaced the shades.